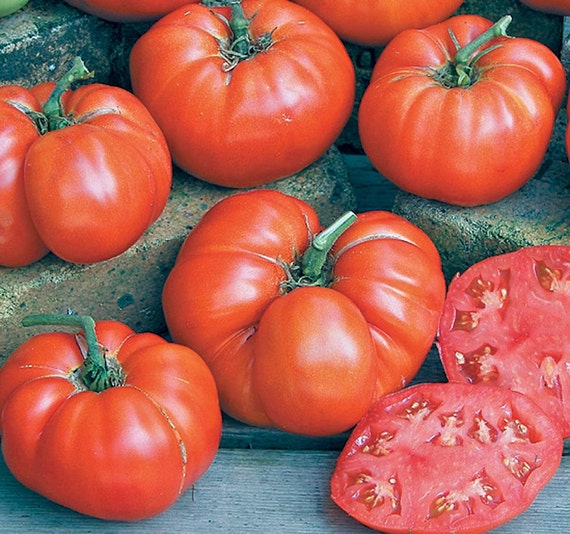
Heirloom tomato Seeds, Ponderosa Red OG' aka Ponderosa Scarlet,Open Pollinated !
- Get free shipping to lower 48 states on orders $54.95+ (Most Items), excluding live plants, plant bulbs, and black plastic nursery crate.
- Most orders are processed by the next day
- Select your desired size and/or color from the available options.
(Solanum lycopersicum) (aka Ponderosa Scarlet) Grown in the U.S. since 1891. Meaty 10-24 ounce flattened beefsteak fruits with deep red skin. Mild and sweet. Tends to do better in humid areas than many other tomato varieties. Indeterminate, 80-90 days from transplant.

Heirloom Tomatoes are our connection to our past, handed down from generation to generation. They come in every color and size; and they come from every country and culture.
The Heirloom Tomatoes we offered are grown by seed, harvested by hand with no chemicals or pesticides.
When to Start
Tomatoes are best started indoors. This needs to be done 4 to 7 weeks before the last anticipated frost date. The seedlings can then be transplanted into your garden anywhere from 2 to 4 weeks after the last actual frost date. Call your County Extension Office to get frost information for your area.To find your average last frost date, go to http://cdo.ncdc.noaa.gov/cgi-bin/climatenormals/climatenormals.pl?directive=prod_select2&prodtype=CLIM2001&subrnum%20to%20Freeze/Frost%20Data%20from%20the%20U.S.%20Climate%20Normals
Start the seeds
If you're using a potting mix, sow at a depth of 4 times the size of the seed. You can also use our convenient Jiffy Pots and Strips -- Jiffy Pots are constructed entirely of lightweight, sturdy peat moss, so as the roots develop, they eventually grow right through the Jiffy Pot wall and into the garden soil!
Use seed starting mix, such as Miracle Gro or Jiffy Mix, to start your seeds. Fill a bowl with some mix and knead in some water till the mix is saturated but not soggy.
If you are growing multiple varieties, you will need a labeling system to keep track of what tray contains what variety. Use tape, plant tags, etc to mark the trays. Be creative - do whatever works best for you to keep track of the varieties.
Plant the seeds about 1/4 inch deep, 2 seeds per cell. I use a pencil with the tip broken off to make a 1/4" deep hole in the center of each cell, and I drop 2 seeds into each hole and firm the mix around the seeds to completely cover them.
Germination
Keep your trays moist and warm to speed germination. Loosely fit plastic wrap over the tops of the trays, to keep water in but still allow for air circulation. Light is not required to germinate seeds.
In anywhere from 3 to 15 days, you should start to see tiny seedlings emerge.
When your seedlings are up and the first 2 leaves (cotyledon leaves) start to open, you will need to put your seedlings under a light.
Use a cheap fluorescent shop light for your seedlings. I use 4' fixtures that take 2 bulbs each. You can use regular fluorescent tubes, or ones specially made for plants. I use GE "Plant & Aquarium" tubes in my fixtures.
It's very important to keep your seedlings within 4" of the lights, preferably closer. If you keep the light too far from the seedlings, they will get very "leggy" - tall and skinny - and might collapse.
Keep the seed starting mix moist but not soggy, and water whenever the surface becomes dry to the touch (but NOT completely dry).
Keep the seedlings watered - not overwatered, but don't let them get so dry they wilt, either.
Make sure they are kept within 4" of the grow light(s). You can adjust the chain that the light hangs from, or you can put the seedling trays on books or boxes to adjust their distance from the light.
Make sure your grow light setup is in a room where it won't get too hot (80+ deg F) or too cold (below 50 deg F).
You will want the seedlings to be easily accessible, because you will be watering them often (every couple days).
Monitor your seedlings and make sure they are growing well. The cotyledon leaves should grow up to 1 inch wide each, and should be a healthy green color.
Damping off can be a problem - this is a disease that causes young plants to collapse at the soil line and die. If any of your seedlings damp off, remove the infected plants and the mix they grew in to prevent spreading the disease to other plants.
Potting up
When your tomato seedlings are showing their first set of true leaves, it's time to put them in individual pots.
Fill the cups with Miracle Gro Potting Mix or similar potting mix. I use Miracle Gro because it eliminates the need to apply fertilizer manually.
Use a pencil to make a hole in the center of the mix in each cup. The hole should be about 1 inch wide and 3-4 inches deep.
Choose the best seedlings to pot up, and discard the rest. If you pot up more than you can grow in your garden, just give away the extra plants when they are bigger.
Carefully loosen the seed starting mix around your chosen seedlings. Gently scoop out each seedling, being careful not to damage the roots or stem. Tap off excess mix from the roots so they will fit easily into the hole you made in the mix in the larger cups. Do this one at a time, and when a seedling has been uprooted, put it in the larger cup immediately.
Firm the potting mix around the roots and the stem of each seedling. Bury the stem all the way up to the cotyledon leaves - roots will grow from the stem and benefit the plant.
Label your cups with the variety name of each plant. I write on the side of the cup with a Sharpie.
Thoroughly water all the cups. Make sure you don't splash potting mix all over the seedlings when you water them.
When the seedlings are all potted up, put them under the grow light(s) and keep them within 4-5 inches of the lights.
Planting out
When the danger of frost has passed, it's time to get the plants out in the garden. Your garden should be tilled ahead of time, and adding compost is good. Soil pH should be from 6 to 7 (slightly acidic to neutral) for tomatoes.
Dig a trench about 1 foot long, with one end deeper than the other. Carefully remove the plant from its pot and loosen the root ball. Place the root ball in the deeper end of the trench, and lay the seedling on its side with the stem in the trough.
Remove all the leaves from the part of the stem that is in the trench, and leave the top few leaves on where they will be above the ground. Bury the roots and bare stem in the trench, leaving only the top few leaves sticking out. Don't worry about their being sideways - the plant will correct itself and grow upwards within a few days.
Trenching plants allows roots to develop along the entire buried portion of the stem. They say this increases yields - I haven't done any tests of my own but it makes sense. More roots allow for more nutrients to be absorbed.
Repeat the trenching process to all your plants, keeping them spaced at least 2 feet apart (if you plan on pruning) or 3-4 feet apart (if you won't be pruning).
When all the plants are trenched, water them thoroughly and add mulch if desired. Drive stakes or cages into the ground, making sure you don't puncture the buried stem.
LET OUR CUSTOMER SPEAK FOR US

![[Seeds] - Caribbeangardenseed](http://caribbeangardenseed.com/cdn/shop/files/gift-card-gift-card-1_1024x1024_dfa857db-9150-4315-a362-7f0bb3fb9c47_60x28.png?v=1722895789)


